Introduction
OpenStack@Louros offers a Ceph-backed object storage service using Ceph Rados Object Gateway, which provides applications with a RESTful gateway to the Ceph Storage Cluster, supporting two interfaces:
- An S3-compatible Rest API, usable with any S3-compatible software.
- A Swift-compatible Rest API, usable with any Swift-compatible software and the OpenStack CLI.
This guide explains how to use the Object Storage service, create a container (bucket), upload and download an example file.
Table Of Contents
Changelog
[2020-11-18]
- Initial Version
OpenStack Dashboard
Follow the instructions below to create a new bucket and upload an example file.
-
Login to the OpenStack dashboard at https://ui.cloud.grnet.gr
-
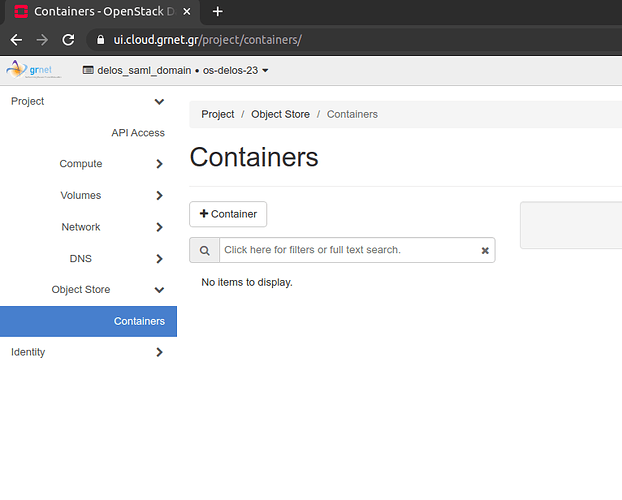
From the side-bar, navigate to Projects > Object Store > Containers.
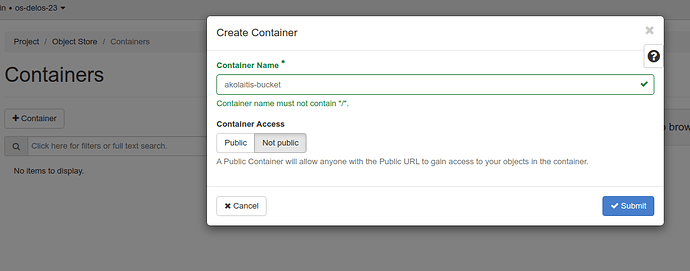
- Click on + Container to create a new empty container (containers also referred to as buckets). Choose a name for the new container, and choose an access mode. A Public container has a public URL that anyone can use to access objects inside that container. For sensitive files, make sure that your container is Not public.
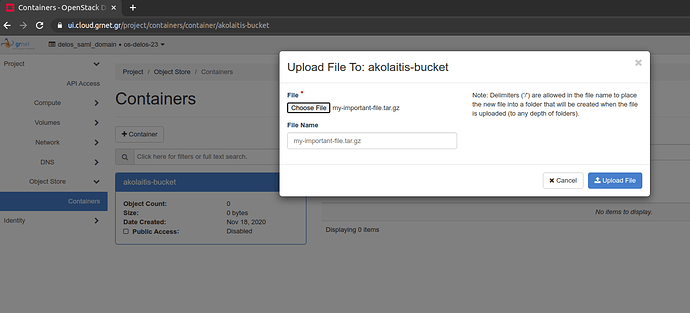
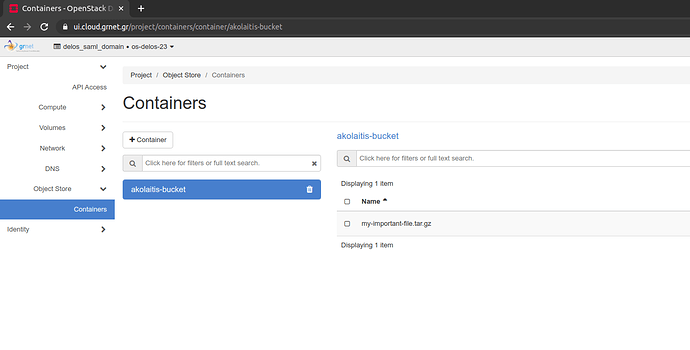
- After creating a container, you can search for files, use the + Folder button to create a new folder, or the Upload button to upload a new file. Choose a file from your local filesystem and click Upload File. This may take a long time, depending on the size of the file that you are uploading.
- You can then Download the file, or view details. If the container is Public, then you can also retrieve a public URL that anyone can use to download the file.
OpenStack Swift CLI
-
Generate Application Credentials (see also Usage Of OpenStack CLI).
-
Source the Application Credentials:
$ source openstack-credentials.sh -
The OpenStack CLI uses the Swift API endpoints to access the user containers and objects. Use
openstack container --helpto see commands for working with containers, andopenstack object --helpto see commands for working with objects. -
List the available containers with
openstack container list. You can see the akolaitis-bucket we created previously.$ openstack container list +------------------+ | Name | +------------------+ | akolaitis-bucket | +------------------+ -
Use the
openstack object list CONTAINERcommand to list the objects inside CONTAINER.$ openstack object list akolaitis-bucket +--------------------------+ | Name | +--------------------------+ | my-important-file.tar.gz | +--------------------------+ -
Use the
openstack object save CONTAINER OBJECTcommand to download a remote object and save it locally:$ openstack object save akolaitis-bucket my-important-file.tar.gz
For any of the above commands, append the --debug flag to see the raw HTTP API calls that are made to the Swift API.
S3 API
S3 API credentials
In order to use the S3 API, you will need to generate EC2 compatible credentials, which comprise of an Access Key and a Secret Key. At the time of writing this guide, this is only possible from the OpenStack CLI:
$ openstack ec2 credentials create -f json
{
  "access": "ACCESS_KEY",
  "links": {
    "self": "....."
  },
  "project_id": "......",
  "secret": "SECRET_KEY",
  "trust_id": null,
  "user_id": "......."
}
Make sure to store the ACCESS_KEY and the SECRET_KEY values safely, as they can be used to get read-write access to your objects.
In order to use the S3-compatible API, you can use any S3-compatible software with the following configuration:
| Config | Value |
|---|---|
| AWS_SECRET_KEY | The SECRET_KEY from the generated credentials |
| AWS_ACCESS_KEY | The ACCESS_KEY from the generated credentials |
| S3_ENDPOINT | https://radosgw-louros.cloud.grnet.gr |
Example usage with s3cmd
s3cmd is a CLI tool that can be used to access an S3-compatible API. s3cmd can be installed with pip:
$ virtualenv --python=python3 venv  # optional, create a Python 3 virtual environment
$ . venv/bin/activate
$ pip install s3cmd
-
Configure interactively with
s3cmd --configure. You only need to configure Access Key, Secret Key, S3 Endpoint, and Use HTTPS protocol:$ s3cmd --configure ... Access Key: <enter ACCESS_KEY> Secret Key: <enter SECRET_KEY> ... S3 Endpoint: radosgw-louros.cloud.grnet.gr .... DNS-style bucket+hostname:port template for accessing a bucket: radosgw-louros.cloud.grnet.gr Use HTTPS protocol [Yes]: yes ... Test access with supplied credentials? [Y/n] y .... -
List available buckets with
s3cmd ls$ s3cmd ls 2020-11-18 20:23 s3://akolaitis-bucket $ s3cmd ls s3://akolaitis-bucket 2020-11-18 20:28 43660 s3://akolaitis-bucket/my-important-file.tar.gz -
Retrieve object with
s3cmd getand upload files withs3cmd put:$ s3cmd get s3://akolaitis-bucket/my-important-file.tar.gz $ s3cmd put another-file.tar.gz s3://akolaitis-bucket/another-file.tar.gz upload: 'another-file.tar.gz' -> 's3://akolaitis-bucket/another-file.tar.gz' [1 of 1] 43660 of 43660 100% in 0s 180.88 KB/s done
Conclusion
By following the steps above you should be able to have a working object store Swift and/or S3 endpoint. Feel free to reach out in case you encounter any errors. Good luck!
~ Aggelos Kolaitis


