
Introduction
By following the Getting Started guide you can launch an instance with an assigned public IP address. Supposing that your IP address is 62.217.94.10, you should be able to connect to your instance with:
$ ssh ubuntu@62.217.94.10
By following this guide, you will be able to configure a domain name for your instance (e.g. vm.test.os.grnetcloud.net) and get a free SSL/TLS certificate using Let’s Encrypt.
Table Of Contents
Changelog
2020-09-17
- Updated instructions for setting up the domain name
2020-03-19
- Initial version
Requirements
- Access to the OpenStack dashboard, or the OpenStack CLI.
- A running instance with an assigned floating IP address. You can use the Getting Started guide.
Configure a domain name
In order to get a domain name for your instance, you will have to create a DNS Zone, and then add an A record for your IP address. If these words do not sound familiar, do not be afraid, since OpenStack will be doing all the hard work for you. If you are interested in learning more about how DNS works, this article from opensource.com is a great resource to get you started.
The domain name can be configured via either the Dashboard the CLI. The instructions show screenshots from the Dashboard. At the end of this section, the respective
-
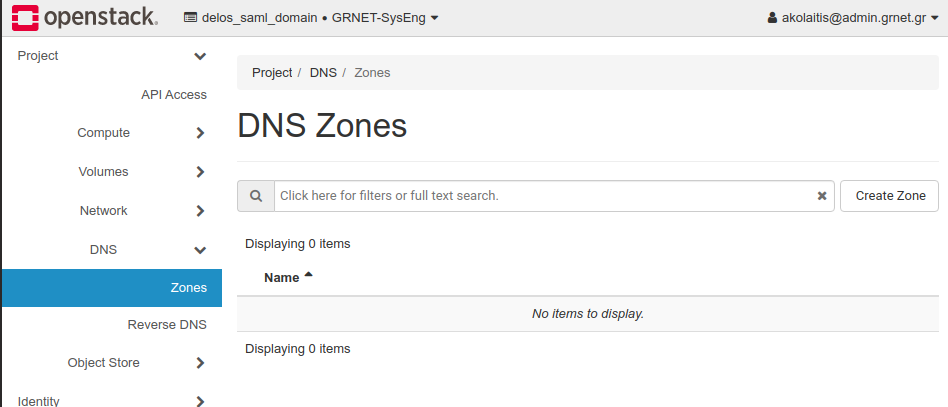
Login to the OpenStack dashboard and go Project > DNS > Zones:
-
Upon project creation, a zone with name
PROJECT.louros.os.grnetcloud.nethas already been configured for use. -
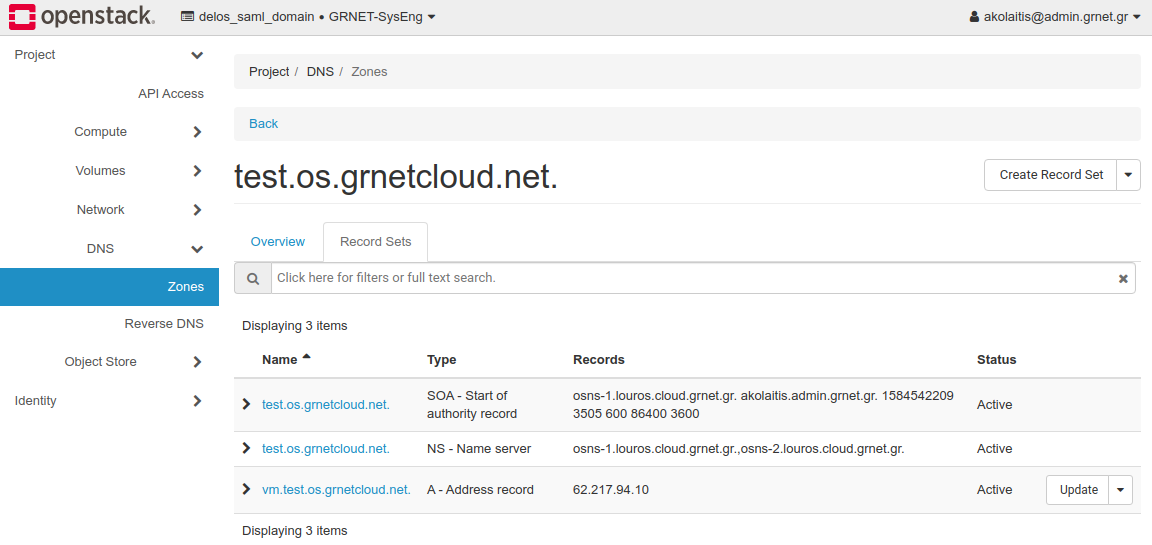
You need to create an A DNS record. Click on Create Record Set and complete the form: Set Type to A - Address Record, Name to
NAME.PROJECT.louros.os.grnetcloud.net.(this will be the domain name for your instance) and Record to your public IP address. Then, click Submit.For this example, we create an
Arecord forvm.test.os.grnetcloud.netpointing to62.217.94.10. This means that whenever someone typesvm.test.os.grnetcloud.neton their browser, DNS will resolve that name to the IP address62.217.94.10, which is the IP address of our instance. -
That’s it! After a few seconds your domain name will be active. You can see it under the record sets list:

You should now be able to do a DNS lookup:
$ host vm.test.os.grnetcloud.net
vm.test.os.grnetcloud.net has address 62.217.94.10
And also connect using the newly configured domain name:
$ ssh ubuntu@vm.test.os.grnetcloud.net
Getting a free TLS/SSL certificate with Let’s Encrypt
About
If you want to host a web server under https, then you need a certificate. Let’s Encrypt is one of the easiest ways to get one for your server for free. The most common tool for managing Let’s Encrypt certificates is Certbot. Certbot only needs to know about your domain name, and will automatically manage the whole lifecycle of your certificate (request, retrieve and automatically renew them when they are close to expiring). Certbot also integrates very well with most popular web servers (nginx, apache, etc).
Refer to the very good Certbot website for instructions on installing certbot. For Ubuntu, these typically are:
$ sudo apt-get install software-properties-common
$ sudo add-apt-repository ppa:certbot/certbot
$ sudo apt-get update
$ sudo apt-get install certbot
Preparation for getting a Let’s Encrypt certificate
In order for certbot to work with your instance on the OpenStack@Louros deployment, you will have to add a security group to enable TCP traffic for port 80.
Allow port 80
-
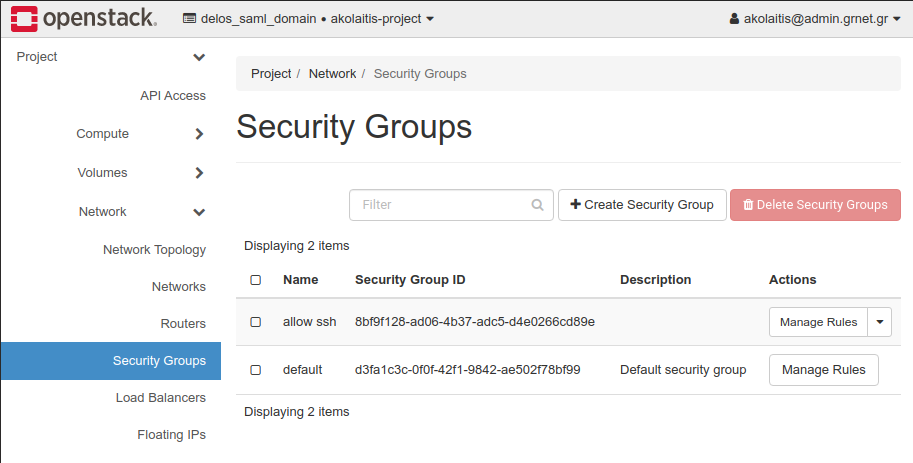
From the Dashboard, go to Project > Network > Security Groups:
-
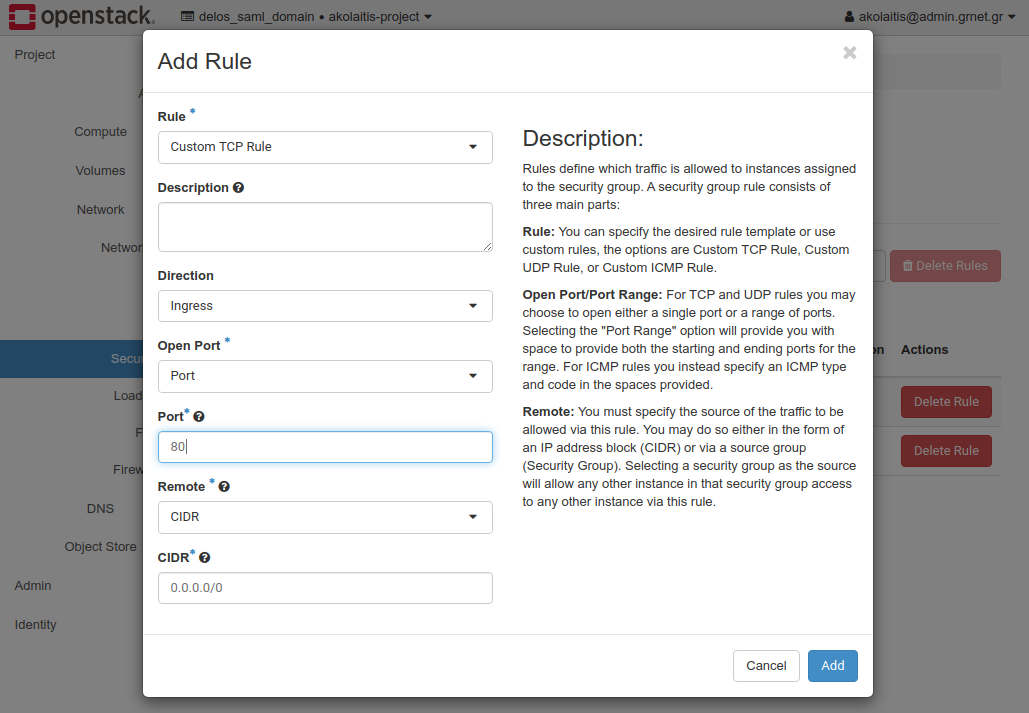
Click on Create Security Group and name it allow port 80. Then click on Manage Rules:
-
Click on Create Rule. Make sure Direction is Ingress and Port is 80. Click on Add.

Getting a Let’s Encrypt certificate
With certbot installed and the rest of the configuration ready, request a standalone certificate from inside your instance like so:
$ certbot certonly --standalone
Done
That’s it! You have successfully managed to setup a domain name for your machine, and also get an SSL certificate with Let’s Encrypt!
Aggelos