
Accessing the cloud
Visit the OpenStack Dashboard login page at https://ui.cloud.grnet.gr . Choose “Delos” in the domain field and you will be redirected to your organisation’s IdP in order to login with the credentials you have.

In the CLI, create a new file user.rc and source it:
export OS_AUTH_URL=https://ui.cloud.grnet.gr/
export OS_USERNAME=<project_username>
export OS_PASSWORD=<project_password>
export OS_TENANT_NAME=<project>
Creating a private network
One of the first steps you will want to perform is to create your own private network. This is the network that will be used for communication between VMs of the same project.
Navigate to Project → Network → Networks. In the top right corner click Create Network button:
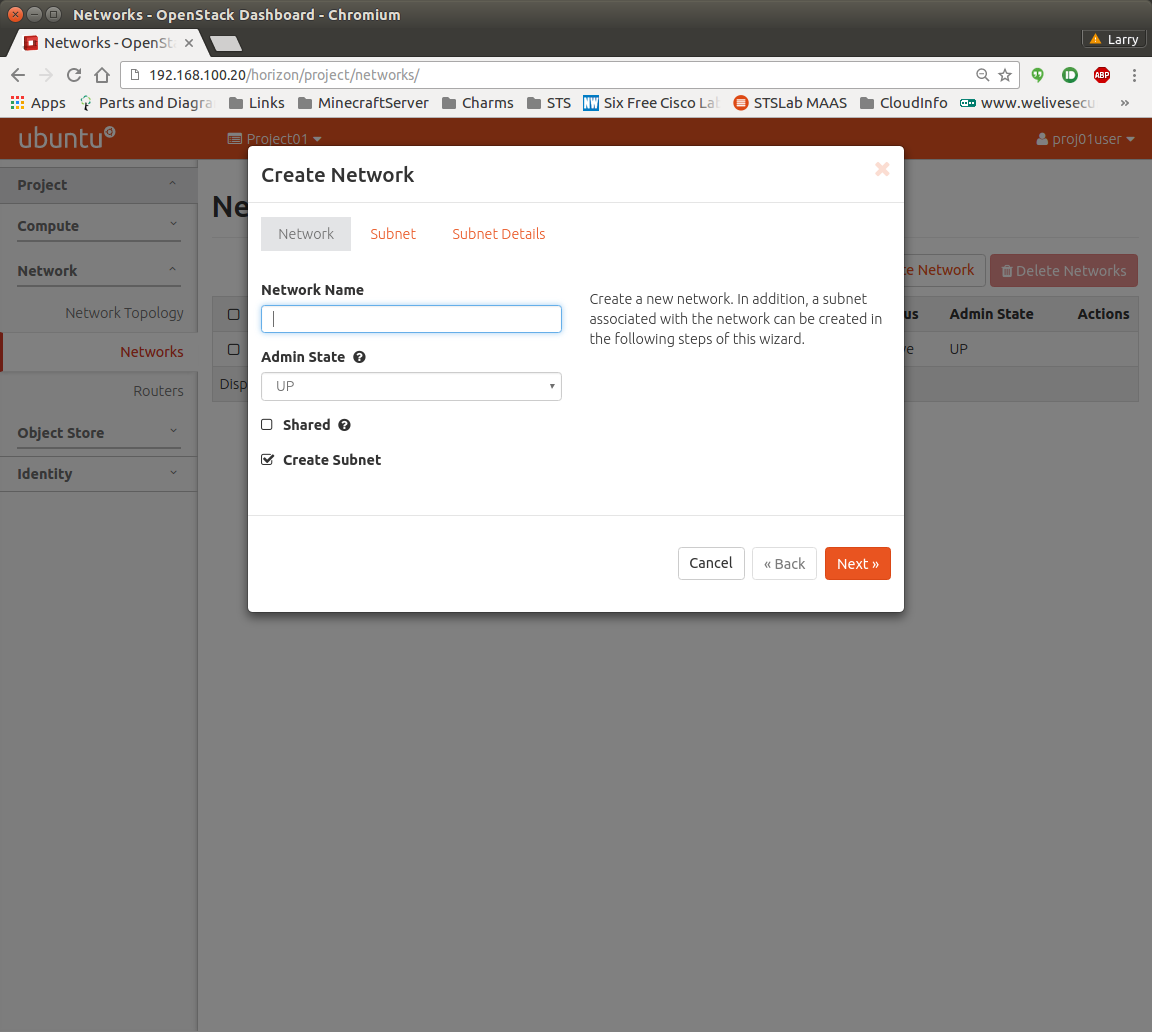
Enter the network name, tick “Create Subnet”, and Click Next.
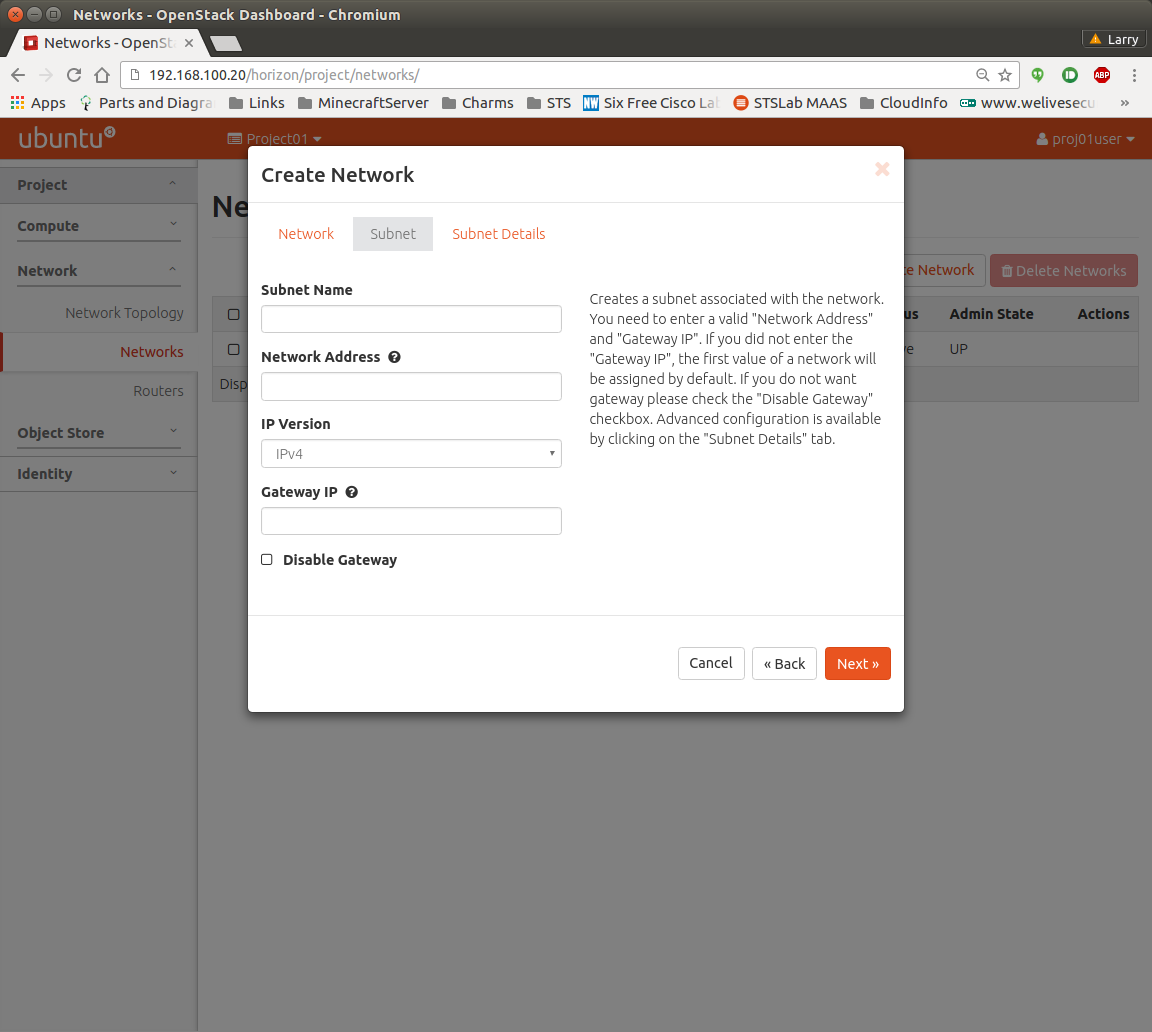
On this tab, fill in subnet information. Network Address is CIDR of the network you want to create. This will be a virtual network, so you can pick any CIDR in the 10.x.x.x or 192.168.x.x ranges that does not conflict with your other private networks. Gateway IP is optional. Define it only if you really want gateway to be behind specific IP. When happy with selection, click Next.
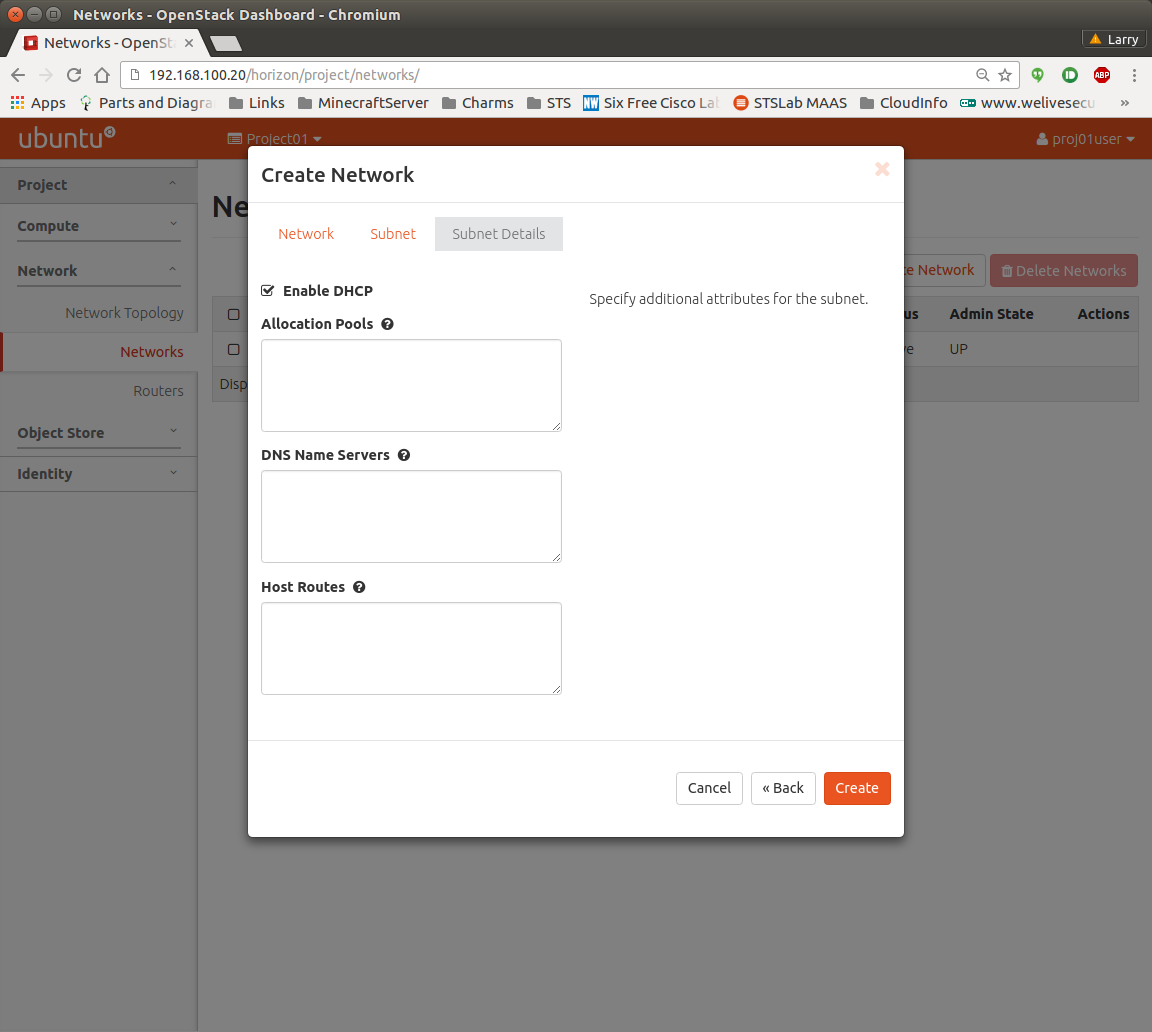
Make sure to mark “Enable DHCP” and press “Create”.
To perform the same tasks using CLI, source the user.rc file and perform:
$ openstack network create <private_network_name>
To create the subnet, issue the following command:
$ openstack subnet create
–subnet-range --gateway=<PRIVATE_GATEWAY> --dhcp --dns-nameserver 194.177.210.210
–dns-nameserver 62.217.126.164 <Tenant_Private_Network> <Tenant_private_subnet>
By default, Neutron DHCP service also implements DNS forwarding to upstream servers using dnsmasq. Therefore, one can leave DNS Servers entries empty.
Creating a router
Open the Horizon dashboard as project user and navigate to Project → Network → Routers. On the top right, click the button “Create Router”:
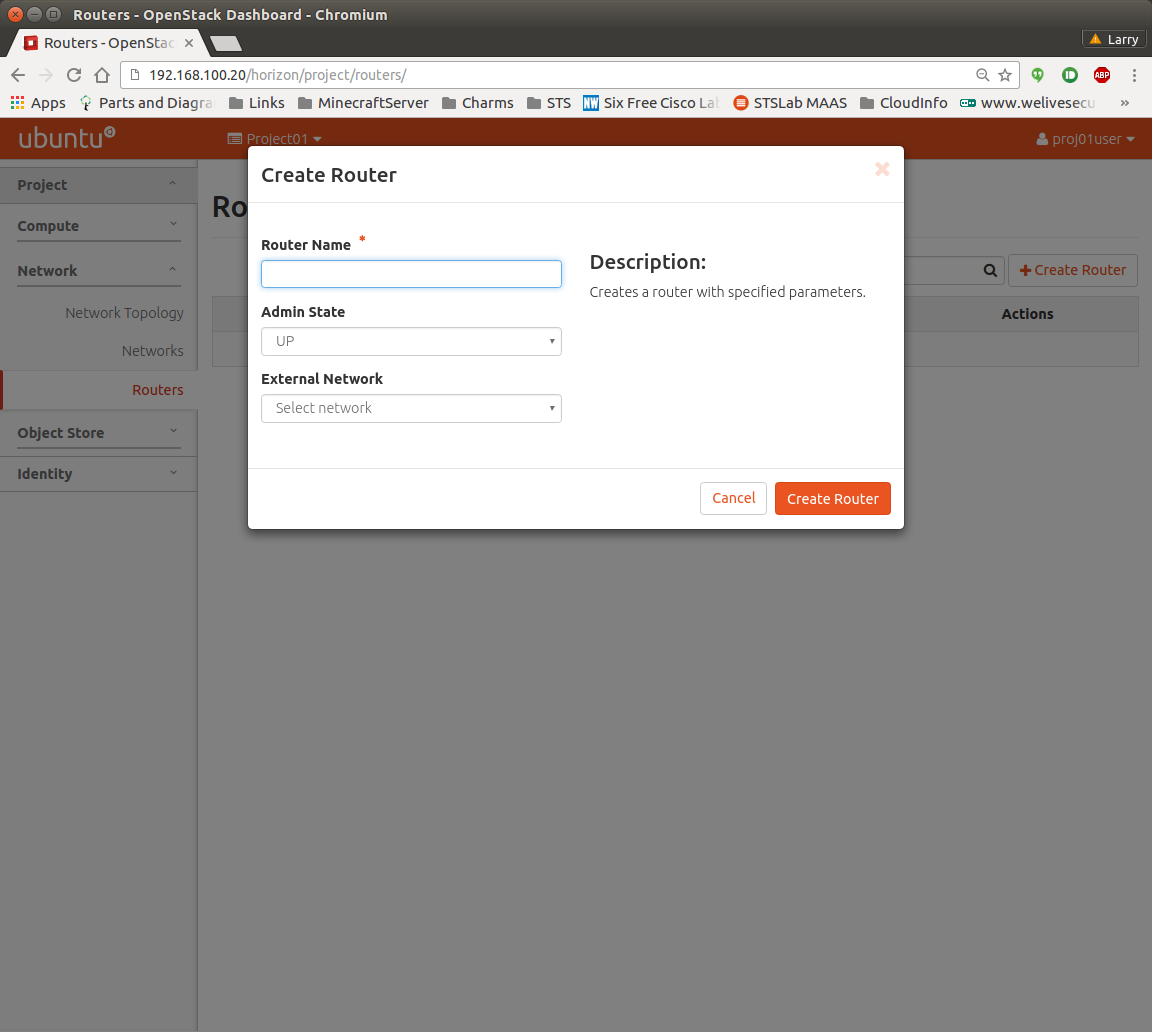
Provide a name and select the public Network as “External Network”. Click “Create Router”. The new router will turn up in Network → Routers. Click on it and select the subnet the interface will live in, in the form as shown bellow:
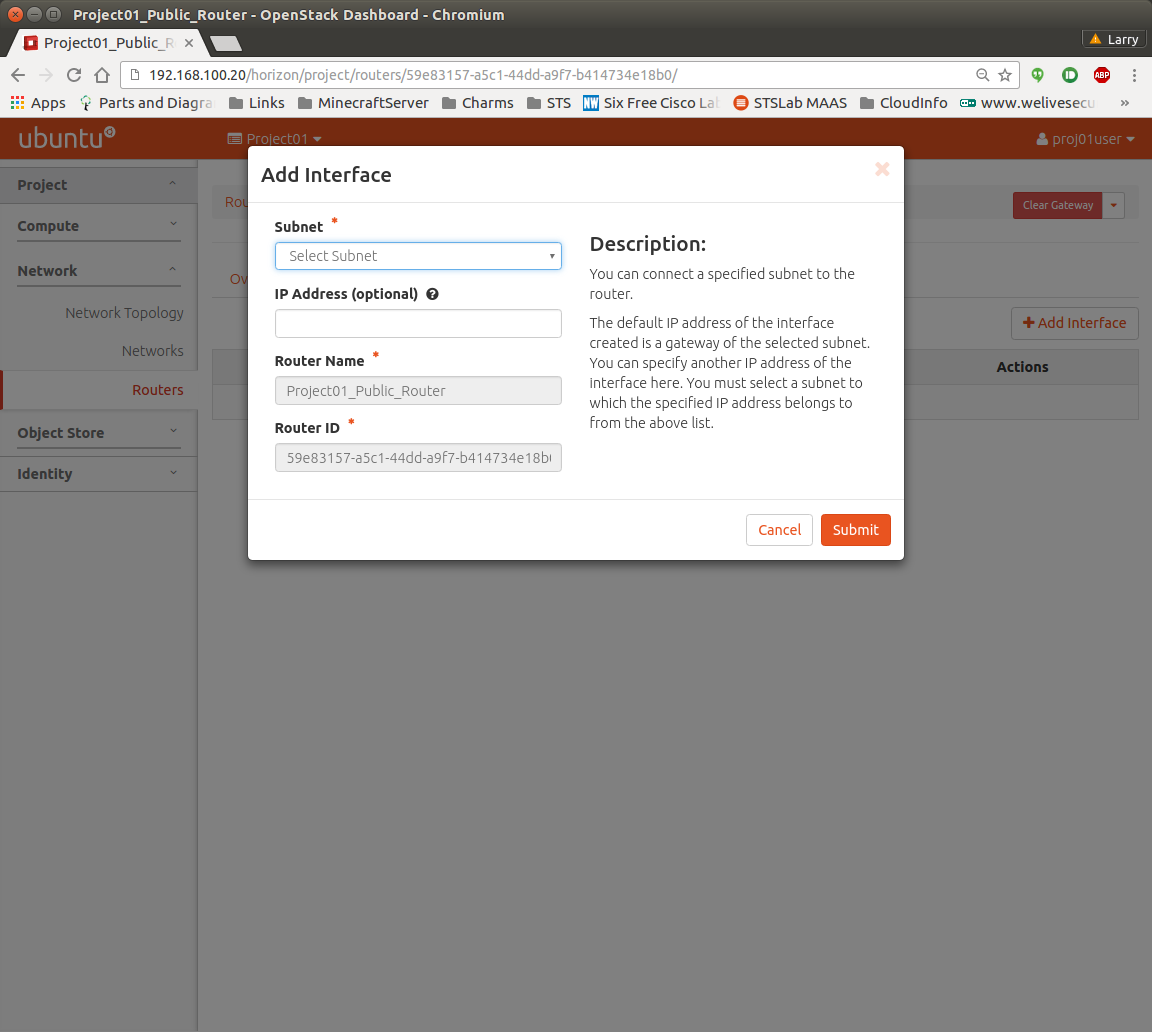
When happy with selection, click “Submit”.
On the CLI, source user.rc, and issue:
$ openstack router create
$ openstack port create --network
$ openstack router add port
$ openstack port create --network
$ openstack router add port
Creating a security group
Security groups provide ability to define firewall rules for your VMs. You can create multiple groups and assign different groups to different VMs. Here, we’ll create a security group that allows us to ssh into VMs that we create.
To manage security groups, log in to OpenStack Dashboard as project’s user and navigate to Project → Compute → Access & Security. Click “Create Security Group”:
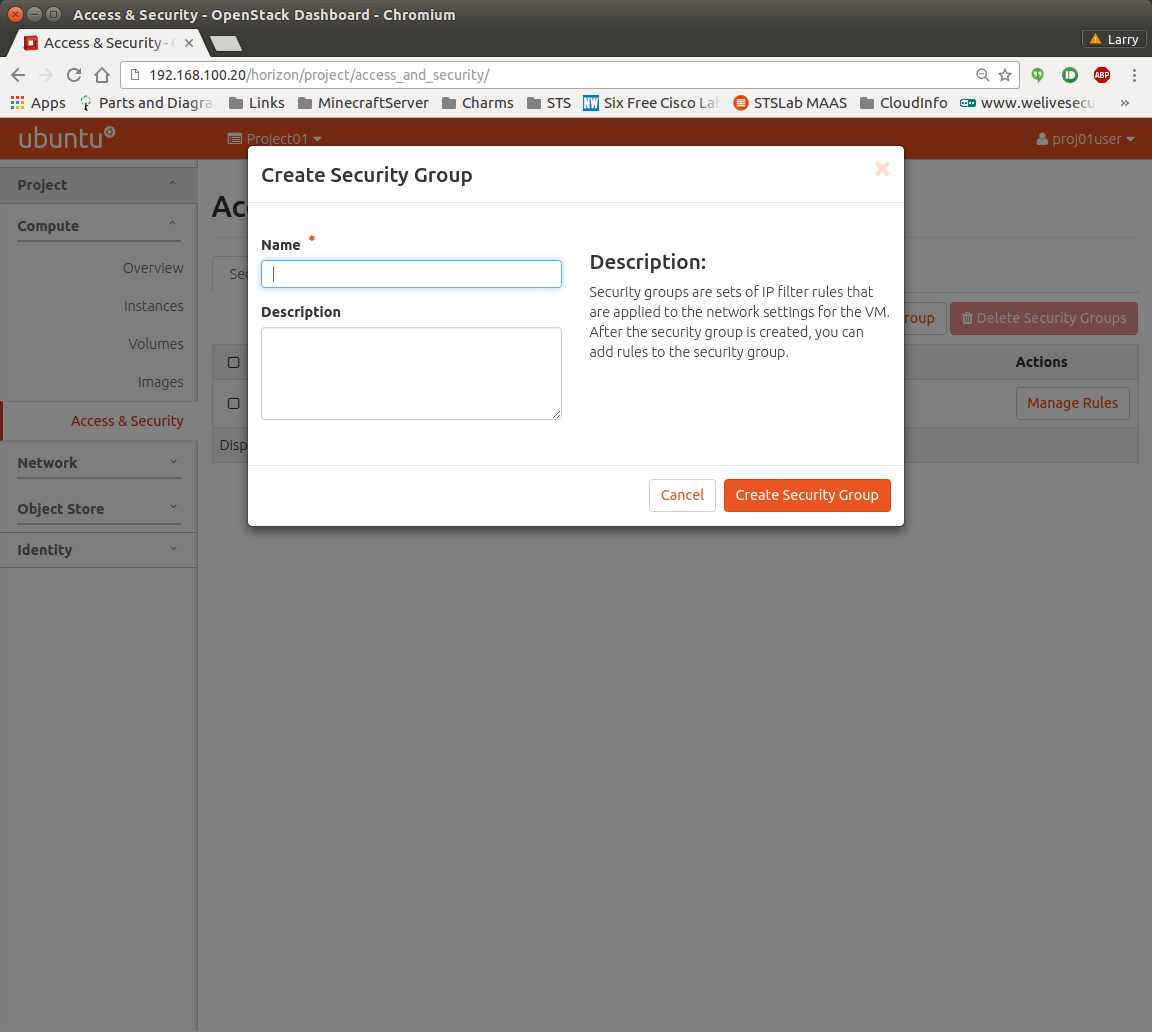
Enter the name of the security group, and click Create Security Group in the bottom right corner. On the Security groups tab, navigate to your new security group and click on Add Rule in the top right corner of the page:
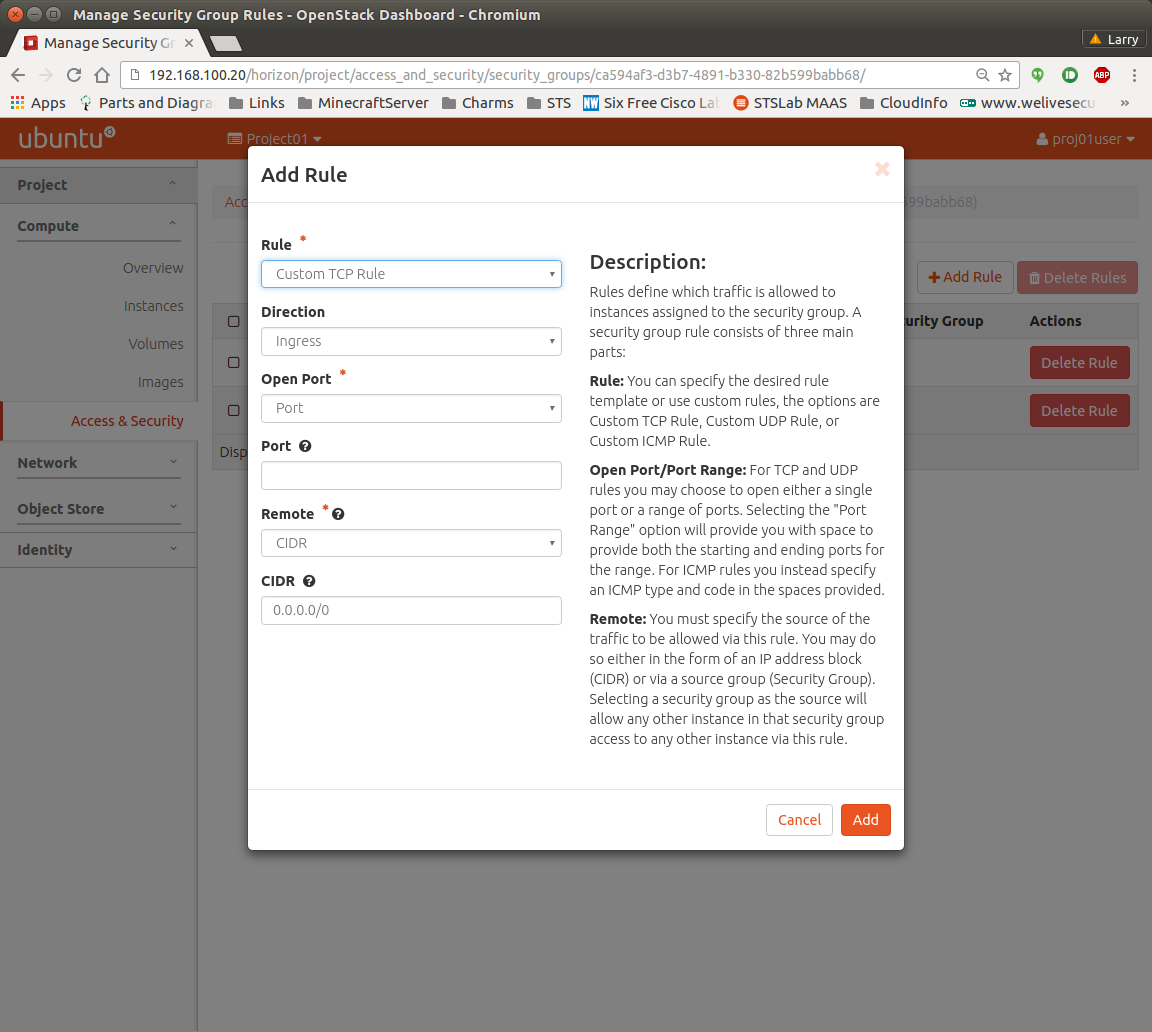
In this form, several default rule definitions are offered in the Rule menu. For Linux systems, we recommend to select one that offers SSH port(Port 22), and click “Add”. In general, if you want to test access to your instances, you might consider allowing ICMP traffic in addition to SSH.
From the command line interface, source the user.rc file and issue:
$ openstack security group create --description ‘Allow SSH Traffic’
$ openstack security group rule create --proto tcp --dst-port 22
(optional) $ openstack security group rule create --proto icmp
Creating a keypair
Many Linux based images do not have default passwords. It’s a security measure to prevent VM hijacking. Instead of passwords, these images depend on metadata service to provide an SSH key that will be used for default user. Before starting the first VM, make sure to create this keypair first.
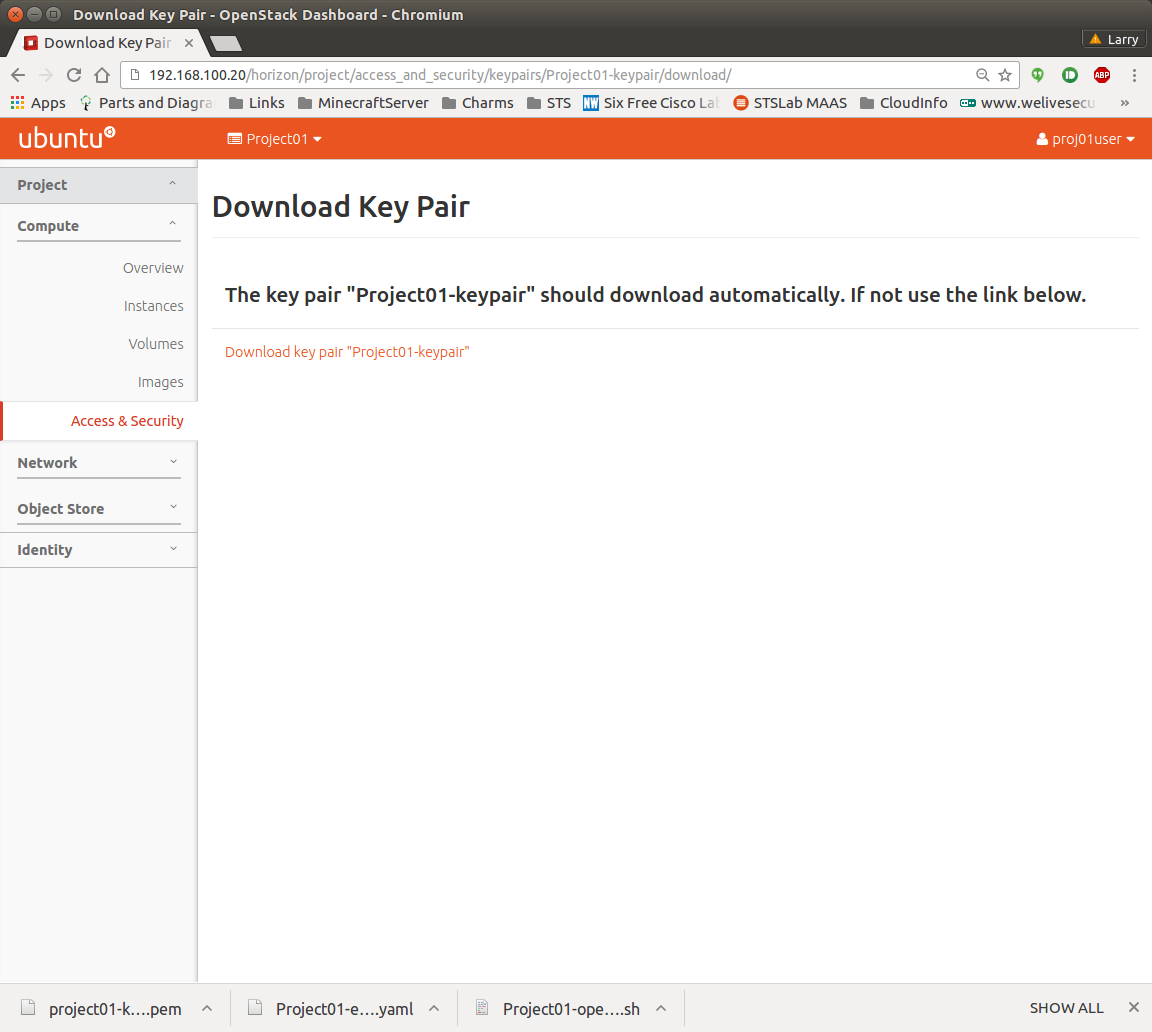
Log in to OpenStack Dashboard as project’s user, navigate to Project → Compute → Access & Security and select the Key Pairs tab. In the top right corner click on Create Key Pair:
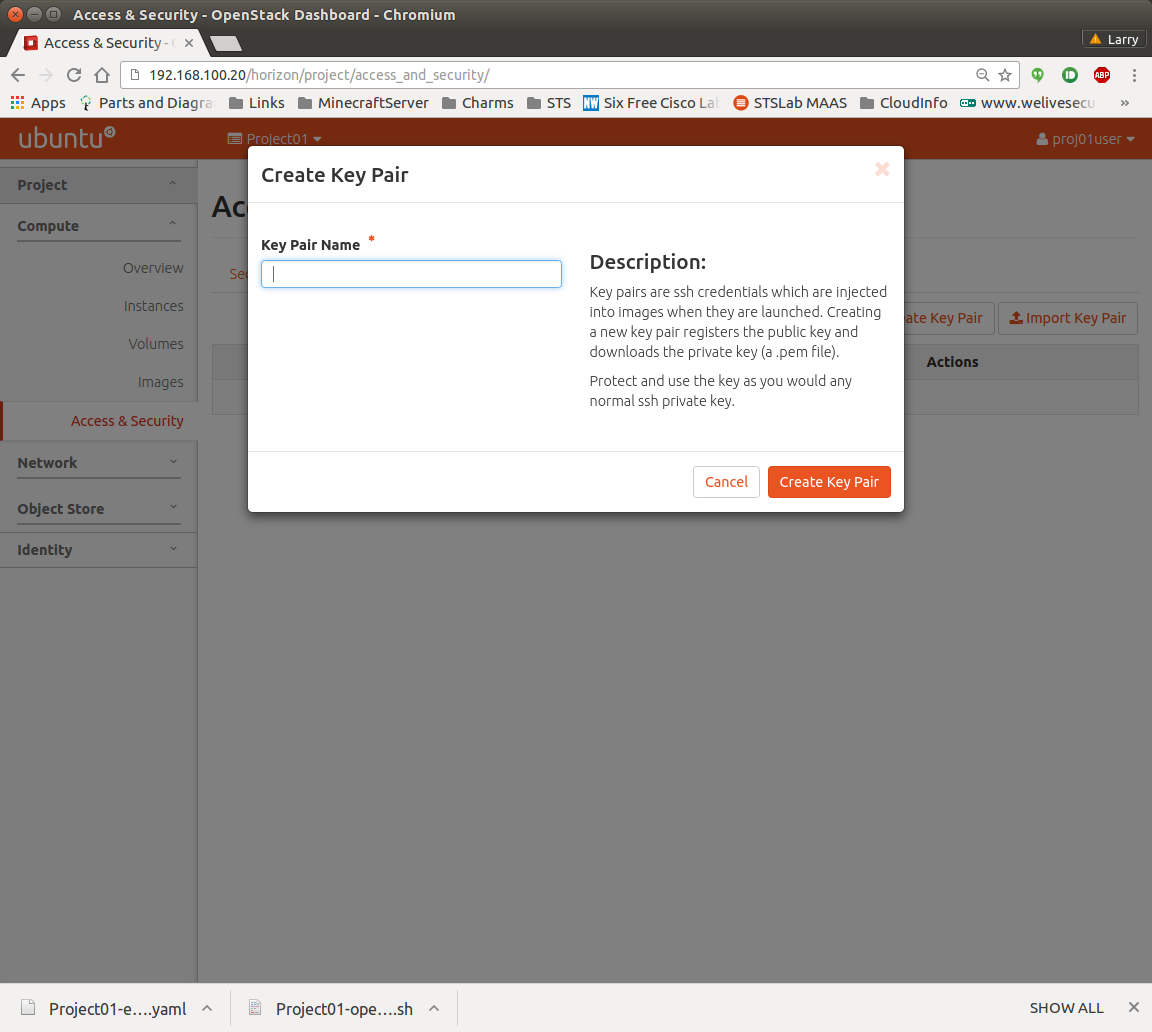
Enter the name for the Key Pair and press “Create Key Pair”. Download of the private part of the Key Pair will automatically start:
In the CLI, source the user.rc file and enter:
$ openstack keypair create > ~/.ssh/.pem
The key you were given will be used to access your VMs later on.
Creating a Floating IP
Floating IPs are meant to provide outside/ingress access to your VMs. These are IPs, created on Public Network and dedicated to one of your VMs. While you won’t be able to see this IP within the VM, all traffic leaving your private network from the VM will be visible as coming from the floating ip. Also, all traffic coming to floating ip will be redirected to your VM.
Log in to OpenStack Dashboard, navigate to Compute → Access & Security, and select the Floating IPs tab. In the top right corner, click on Allocate IP to Project:
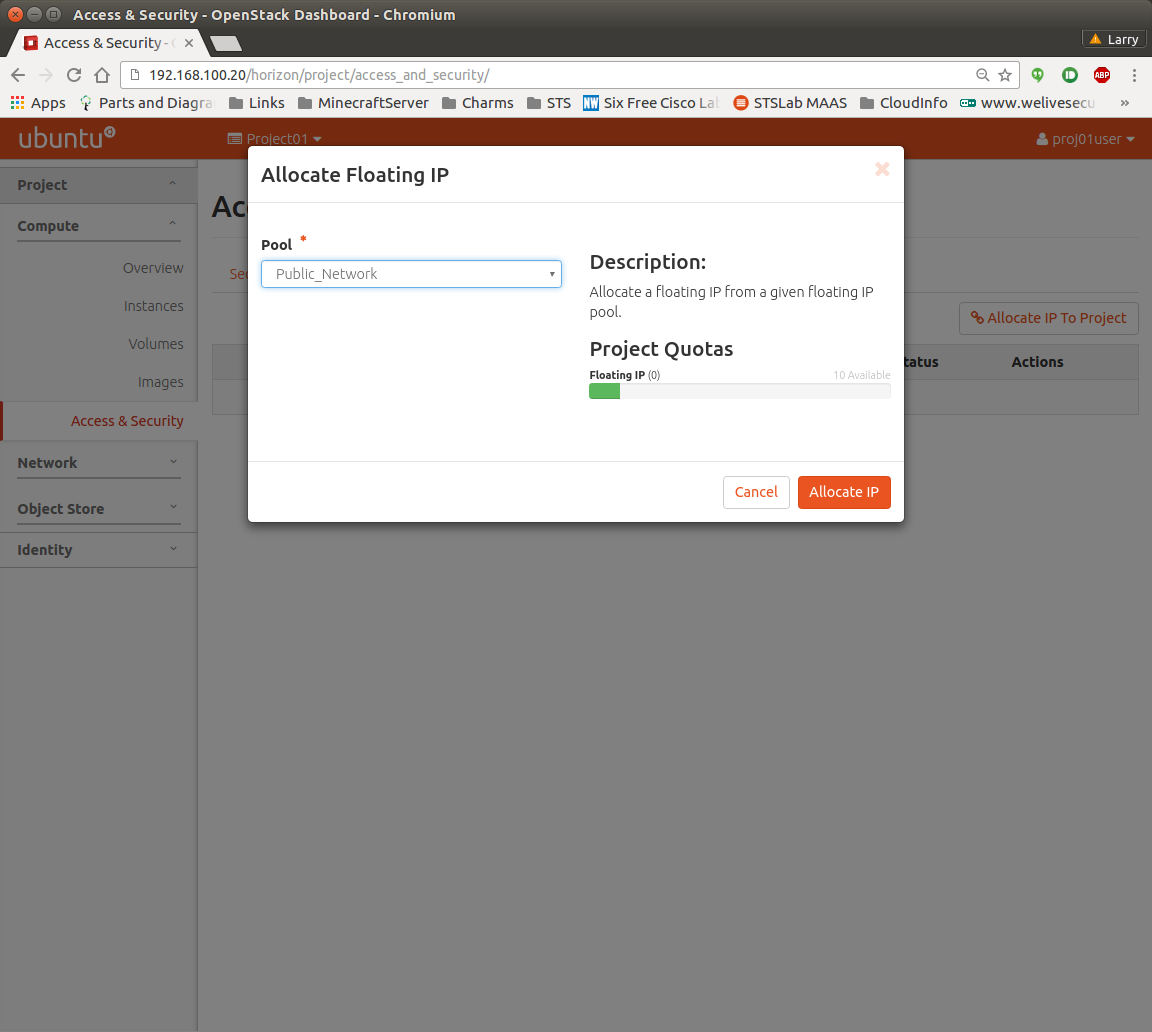
Select your public network as Pool and click on Allocate IP.
In the CLI, source the user.rc file and execute:
$ openstack ip floating create
Adding an image
To successfully launch an instance, you will need to provide an operating system to launch. These are provided in form of cloud images. Latest Ubuntu images are available at http://cloud-images.ubuntu.com.
To add an image to your Openstack cloud, proceed to the dashboard, login as your tenant user, and navigate to Project → Compute -> Image. Clicking the “Create Image” button In the top right corner will start the process of importing an image:
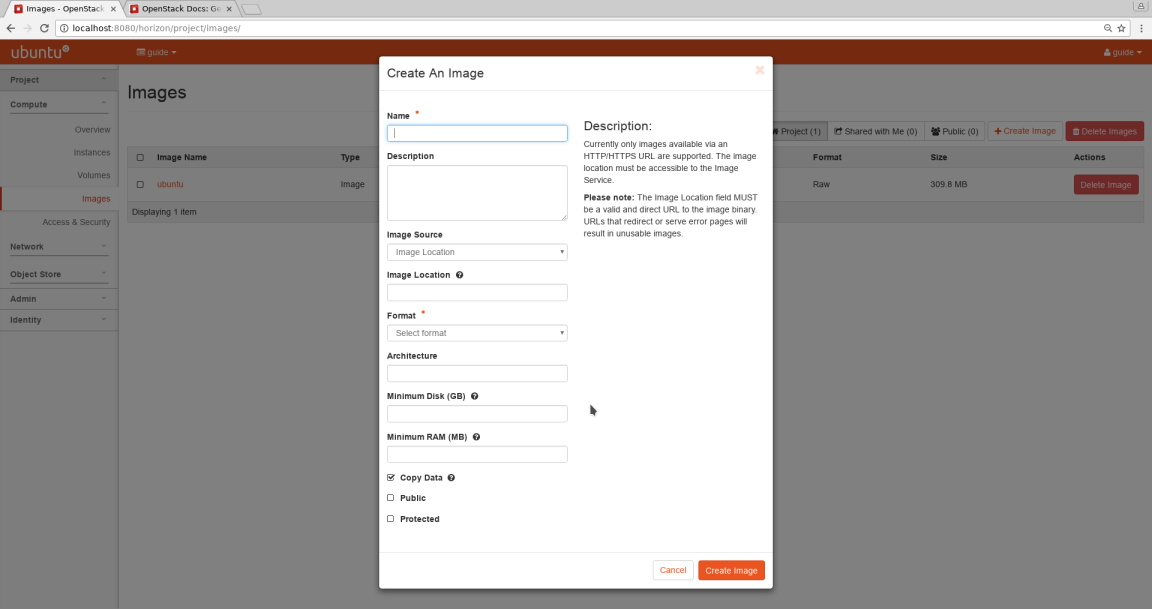
Set the name, choose “Image location” and enter the url from which the image will be downloaded. In case your OpenStack Dashboard doesn’t have Internet access, you might consider uploading an image directly. In the drop down menu “Format” choose the format that correspond to the downloaded image (the most common are QCOW2, or RAW) and click “Create Image”.
In the CLI, source the user.rc file, and issue:
$ wget
$ openstack image create --public --min-disk --container-format bare
–disk-format --property architecture=
–file <image_downloaded>